Walkthrough for the DOS game The Infernal Tome[]
Keywords: MVP Software Infernal Tome Adventure Game DOS 1994-1996 P'Tah and B'Nah, Dryadens, Grimhadens, Humans, and Halflings.
|
|
ATTENTION: This guide is based on game-spoilers! |

 This article is rated as a good article, and represents the best of Walkthrough Wiki.
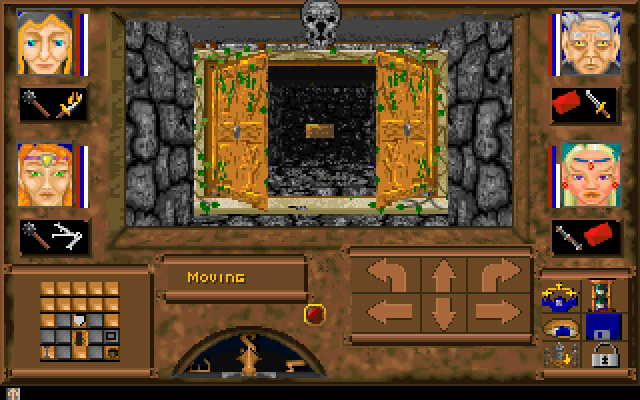
Tome: A door in chapter #2
INTRO[]
Where to download or buy this game?: Please refer to the (External Links section).
This guide is broken into 30 numbered sections, sometimes I may refer you to a section in a certain paragraph. I hope this helps.
The full version of this game has 3 chapters (3 episodes, aka trilogy), but this walkthrough will ONLY guide you in the "ShardMoure Keep: Prelude To Glory" episode (Chapter#1).
Once you CAN manage Chapter #1, the rest of the game will be easier to play, taking into consideration that you know monsters, walls, traps, potions, spells, etc.
THINGS TO REMEMBER[]
- To "move" or to "turn" and to "side-step" to the right are two different things! When I specify "side-step", I mean you click on the straight right or left arrow, which will make you move a step either right or left, while still facing the same direction. Once you play the game for an hour or so, you will be pretty familiar how this works. When you learn how to use these to your benefit, you will be able to flee from monsters, or reach a destination more effectively.
- Important places and items may be pointed out in ALL CAPS, this is to make it easier for you to find them in the walkthrough.
- I believe it's possible to make the game impossible to pass, if you waste keys in the wrong doors. Lockpicks wont be available to you until much later, meanwhile there are doors that may still need to be opened to get to that area.
KNOWN PROBLEMS IN TOME[]
I had a couple of my characters suffer from a bug that seemed to appear when I used my magician (My-Fetu) to attack a lot, P'Tor and Edinus just wouldn't attack. This might be a bug or it might just be your character's stamina is too low. As the level progresses and you face more powerful monsters your fighters can't take them. If you have this bug there is only ONE way around it. Your fighters will only keep getting worse as the level progresses, as your magicians will be doing all the attacking. Start a new game with your saved characters. This may sound like a lot but really, the shareware version is SO short that it's worth it. A problem you WILL face is that all the traits: poison, hunger, etc. are carried on. For this reason you should do this as you reach the MIRROR in the garden. If you need to reach the MIRROR before your time because you have this bug, go to the GARDEN section (paragraph section 18).
IMPORTANT TIPS[]
- Hunger - Your character will suffer from hunger mostly when resting. So when your character is complaining of hunger, make sure to move a lot. There isn't any food around for now, so moving will have to do (to find food see section 29). If your character is being hurt by the hunger, cast P'Tah's Balm, it's the only available option now.
- Death - There's a spell and a potion that will revive your character, but like I said above, the MIRROR in the GARDEN will have to do until one of your characters learns the spell.
- Attacking - Throwing-knives are quite useless, try to use the sword or the fire-stick instead. When your character is not healthy his attacks will be poor. That character will not be able to cause much damage to monsters, so your best bet is to run if you have the room to move. The MIRROR will restore everything including valor points, once.
- Resting - Resting will cure everything except hunger and poison, you can not revive a dead character by just resting. The MIRROR in the GARDEN will revive dead characters (once). Alas, you wont be visiting it anytime soon so save often! Do not rest more than you have to, remember, your characters do not have any food to eat. Taking cover from a monster (behind a wall for example) is a good way to restore HP, click the camping icon, a few seconds will do wonders.
- Fleeing A Monster - In long corridors turn around and run for it. If you're cornered, you can not run away and must restore a previous save. Moving in a diagonal direction for example (south, east, south, east) then (north, east, north east) should rid you of the monster. Learn how to use side steps to your advantage!
- Spinning Skulls - They will recharge your fire stick by right clicking. If your characters are weak and are low in valor points, firesticks are the only way to survive. Skulls CAN NOT be seen in the map, and due to optical illusion they may appear as if they were floating in mid air. The truth is, they are not "floating" in mid air, they are actually part of the wall you're facing, and they can't be seen when you're not facing the wall (sideways).
- Doors - There are many ways to open doors: Keys, Tokens, Levers, Combinations, etc. Left clicking in the item (token/key) in your hand or inventory while standing in front of the door should get it easily opened. If the door does not open, you can be sure that's not the right way to open it, and you'll need to seek another way in. The number of keys in the game is NOT adequate. Save the game before you open a door to a room and find you wasted a key in vain! You can get lockpicks, later in the game.
- Potions - You'll find several potions if you search around. The red potion is a one-use poison cure. Be careful with using these by mistake in a healthy character, you will not get a warning and you will definitely lose the potion. The aquamarine potions are actually Wither Potions (they can clear out weeds).
- Push Walls - Throughout the game you will find many walls that can be pushed, as long as there's room behind them. There's a spell you can cast to make these vanish but that's not until later.
- Knowledge Circles - There are two that will upgrade you in chapter #1: Shardmoure Keep. I strongly suggest you answer both of these BEFORE you decide to wander to the GARDEN.
- Saving - Save your game often, have several saves in case you need to go back to any. I believe the limit of saves is 5. The Tome directory is ONLY 18MB (registered game) there is no harm in keeping a couple of these to have more saves.
- Pausing - You can pause the game by pressing the ESC key. You also have options to "end game" and "save game". You can also continue from there.
Playing in DosBox[]
The game plays without any special settings in DosBox. This is perhaps the most native way to play this game nowadays. It plays GREAT in a Macintosh also, so please no excuses like: "I have a Mac I can't play Tome"... -- get DosBox and shut up, then have fun! :D
ANSWERS TO PUZZLES[]

Ch2: A Knowledge Circle
THESE ANSWERS TO THE WORD PUZZLES CAN BE FOUND IN ONE OF THE FILES IN THE TOME DIRECTORY, THE NAME OF THE FILE IS: LONGTXT1.DTA
- QUESTION 1:
- Fear I make in your hearts man
- End I bring with the passing of time.
- End of the journey, passing of sand.
- Life again-reaping of the vine.
- ANSWER: DEATH
- QUESTION 2:
- Welcome to the ancient keep of Shardmoure, bastion of Garon's northern reaches. I am Cho-Tek, abbot of the Dark Monks. My duty is to protect the charges entrusted us by B'Nah. What name call you your path?
- ANSWER: DARK PATH
- QUESTION 3:
- Dragon's wings and witch's blood.
- Free from sorrow out of the mud
- Light of day power of the sun
- Name the tomb of the ancient one?
- ANSWER: HAMAS
CHAPTER 1: PRELUDE TO GLORY - WALKTHROUGH[]
VESTIBULE CORRIDOR[]
1. YOU START IN A CORRIDOR, facing EAST, a freaky ghost laughs at you and disappears. If you walk forward twice you can turn to the left or right. Try to get a feel of how the controls work, there's a window right behind where you started from, rather than a door (strange). To the right, you will find a rusty armour, there's a necklace there, put it somewhere you will need it soon. The rusty armour to the left has an aquamarine color potion (it's a Wither Potion, check tips above). If you continue to walk in the corridor, a short wizard laughs at you and introduces himself as Daemon, scary but unimportant. Believe it or not he's your enemy even though he's not attacking. You will find that most friendly characters in this game are creepy looking and it is hard to believe some of them are on your side. Pick up the sword you find, you'll need it soon enough. You will also find a key there. Now walk around, examine everything, specially dressers, funny looking walls and walls that look different in your map. There's nothing in the flags, that I know of.
2. The necklace wont last long, it will soon disappear when you pass by the entrance with what seems to be a pendulum of light, you can't go through without it. You should have two keys, one sword, and a Wither Potion by the time you pass by that door. -You will find several keys throughout the dungeon, however, you will not have enough keys for all the doors you encounter so, I suggest you save the game right before you unlock a door, and if you DON'T find anything important in the room, to reload your game and keep exploring.
After you pass the door, walk forward and you'll see a spinning SKULL and a firestick right below it! The skull is granting you a great gift indeed. Try holding the stick up to it and clicking the right mouse button; your firestick will recharge!
3. Now the only way you can go is toward the left (North) then to the right (East), there's a door, and a lever nearby. Turn to your left facing north to face the lever, and click your right mouse button. The door opens, there's a plaque that has some poetic message but I don't consider those "clues" important, you can easily ignore those. You'll be warned by one of your characters about "spider stench", sure enough you'll encounter one soon. Step back then go to the right (South), then turn left (East)... be alert, it will be there before you know it. Behind you, there is another spinning skull, so if you desire to step backward and recharge the stick, you can do that too, but it also gives room for the -spider- to poison your characters. P'Tor should be good with the sword so use it until the spider is dead. My-fetu is really good with the firestick, and I had no problem killing the spider at all.
4. Keep going forward in that corridor, there is another rusty armour nearby, lamps and a bench, nothing to see there. At the end of the corridor you can go to the right, there's an entrance to a LARGE ROOM WITH PILLARS.
Important Note: Later in the guide I will refer to the past area as the VESTIBULE CORRIDOR, includes the section where you start from and the first spinning skull.
LARGE ROOM WITH PILLARS[]
5. There is no need to be afraid, because there are no enemies here, but there are plenty of skeletons and room to move around. There are 2 vests you can wear. The throwing-knife you find is extremely useless, damage you make with that is so bad I think is not worth wasting a move for. Take it or leave it. To the far right (West) there's a set of stairs. You should ignore those for now, they -eventually- lead to the garden (see GARDEN section). What you want to do now is, examine the wall when you're facing south. It is straight from where you came in from, two side-steps to the left. If you're having trouble finding where you came from, remember you came from the north entrance. Just face the wall to the south then side step (right or left) depending where you are. You will see something that looks like a button on the wall, and it's light gray now. -You want to push all the ones you see in the dungeon, once you do that they can not be un-pushed so keep that in mind.
Once you push that button, perform 3 side-steps to the left, and ta-da! A new set of stairs, and that's where we want to go :)
6. Now be very alert because there is a -dark monk- coming at you when you turn left. Since I don't want you to be caught un-aware, do get rid of it before you explore (you might need to walk forward a bit). One shot with the firestick should take care of it, but P'Tor is more than capable of killing it. The dark monk creature will drop a vest, do pick it up. To go back to charge your stick turn around, as you can see there's a letter "B" on that wall (for B'Nah). -(go to paragraph 7 to skip charging the stick). Go back down the stairs, go forward completely and side step to the left 5 times and there you go, move forward twice and left, keep walking to find the lovely spinning SKULL. Do the same when you re-enter the LARGE ROOM WITH PILLARS. You'll need to do this often, so get used to it! Now go back up the stairs where you killed the dark monk.
7. In the first entrance to the left (step back if you need to), you'll find a button on the wall like the one we found before. This button will make that wall crumble but, there's nothing in the chest (this is not strange as you will find many empty chests also with traps in them). Go back to the hallway and keep walking past a couple of windows to your right, then you reach a dead-end with another window, face the window. The hallway does have an entrance to the left; however if you pay close attention there is a button on the wall, if you face to the right (East). The button will open a locked gate further to the left (west) passage. If you don't push it and go on to the west passage, you will be able to see the gate.
On that pathway you can turn towards the left (south) and you will find a water-looking-like thing glowing with an old man's face, lets call this a "KNOWLEDGE CIRCLE". This is where your riddle skills are measured, right click and he will ask, the answer is: DEATH
8. You get some valor points, for your characters as the prize. Get out and if you've pushed the button I mentioned above, you can go through the gate to the west, keep going to find a bench holding a key at the end. Do not leave until you push the button on the wall toward your right (south wall). This will open a pathway on the entrance where you came from (where you saw the letter "B" near the stairs). So move back to where the letter B was, and you will find a hallway that wasn't there before. Go in to find yet another button on the wall (I did tell you you were going to be pushing a lot of these didn't I?) now a new corridor has opened. Get back to the hallway and you'll find a door at the end. Toward the right there is a "COATS OF ARMS". The COATS OF ARMS can't be moved, they don't hold anything and are also pretty useless... you'll find many of these from now on.
Remember what I told you about the keys? Well, now may be a good time to save your game.
THE LIBRARY: 1ST VISIT[]
9. Wonderful! This is actually the LIBRARY one of the most important places in this chapter. Search everything, you'll find a couple of scrolls, and a red potion (one use poison cure) in one of the shelves. If you keep wandering around you'll find Cho-Tek (where the bench is), and he will ask you a question, which you'll answer with: DARK PATH
He will reward you with a necklace and valor points. I guess they have a good reason for that. The scares these guys give you, must make you stronger somehow! You will see a statue and a gate, you CAN NOT move the statue and the gate can't really be opened (as far as I know) but refer to the garden section to see how to get on the other side of that gate.
10. Now, before you take those stairs behind the LIBRARY you've been dying to climb down, make My-fetu learn the poison heal spell. If you try to teach it to Edinus, you'll most likely get a message that he knows the Bless spell already (because he's not ready to learn new spells yet). The others can't learn it. The heal poison spell is one you need before you reach the garden and that's exactly why I told you not to go to those stairs in the LARGE ROOM WITH PILLARS. By now probably My-fetu is complaining of hunger also, you have no choice but to ignore her, she's the one who just wont keep it to herself, and there's no food around so walking will have to do for now. If she's starts to get hurt by starvation cast P'Tah's Balm, it's the only available thing now.
11. Now make sure to have a current save (or save now) because a lot of things are going to happen now. Your firestick should be charged, because the dark monk you're about to face is extremely strong (about 130HP). Go down the stairs, and try to get P'tor to attack it, he needs the experience. If all else fails use the firestick, everyone gets experience but I believe the last to hit gets the most. There's also a spinning SKULL, it's a bit tricky to find this one, step on top of the dead dark monk, face South. Move like this and you will find it: Side step right (4), one step back, side step right (2), one step back, side step right (2). SKULL! *charge the firestick quick!*
Now turn west and keep going, you'll find a door to the right that needs a token to open. That token is in the garden so you can't get in there yet. You'll also find an arachnid friend who's coming to greet you! When you're done killing the spider, make sure to cast a cure-poison spell, if you should get poisoned by it. Keep walking west and there should be a hallway to the north. Now turn north, but stay there and read the next paragraph.
THE LOCKED DOORS[]
12. Now this is the tricky part, you have lots of keys, but not enough for all the doors ahead. So save your game. Face North on that hallway. The first door, toward your left (West) is a must. Open it and reveal a room with a dresser and a COATS OF ARMS, you want to find a wall there with a button. If the room you arrived into does not have a button on the wall, reload your game.
When you're sure you're in the correct room, press that button and make yourself at home, no enemies here. There's another KNOWLEDGE CIRCLE test here to the hallway on the right, you must go south then turn left (facing the East). The answer to the puzzle is: HAMAS
13. Now go to the hallway you saw toward the left of the entrance and you will find TWO other buttons. The first one doesn't lead to anything important, but do look around. You should be in a room with many pillars in the center, you should be able to see a door out of reach in the map, you can not see it, it shows up as a wall. This is a secret token door that you don't need to open (see section paragraph 25 for an explanation). The other side of this pillar isle has a chest at the end, but to the wall on the right there's an entrance. If you keep going ignoring the misleading entrances around (that are nothing but dead ends), you will reach an indoor ALTAR TO B'NAH (you're facing East). There are two poison-cure potions there. There are also SKULLS spinning, right-click to recharge your firestick!
Now I mention "indoor", because there's an altar just like that in the garden outdoors. Make your way out of there, (you can see the back-side of the KNOWLEDGE CIRCLE you already answered) remember to reach the room with the dresser and the COATS OF ARMS, then make yourself out the door you opened with the key, turn left. Now we must go on and check the others. Remember to start by facing North and moving forward two spaces.
14. Now there are two doors, one on the left and one on the right. Before you open either, save your game and try them both. As you can see, nothing to see here and both rooms are almost identical: a dresser, a bench and a COATS OF ARMS, no items.
You should reload the game with those two keys and move on, the hallway continues to the West (left), then to the right (North). There are more doors ahead just like those you saw, and a spider comes to greet you. Get it out of the way first before you start messing with the doors. Step back if you need to. The door to the right has the same items, with the small difference that it has a torch inside. I wish I could get all of these opened now, but not enough keys for them; and you wont get lockpicks just yet. So lets move on to the next door, to the left, same things.
15. Now next door to the right (third door on the hallway, but -second- door to the right side) the same things but, there are walls you can push. We haven't done this before, so this will be a bit strange; and rewarding! You can see them in the map, a simple look at them off-map wont reveal their originality. As long as there's room behind these type of walls, you can keep pushing.
Start by opening the one toward your right facing south (right-click), you'll encounter Hanby. He's an old wise monk (warning: spoiler alert #1) who will tell you a couple of things about the garden and the EYE of B'Nah... He speaks of a "torture chamber", the place is not a pretty sight. The old hag doesn't give you any items but once he vanishes, you will see a chest. BE CAREFUL, that chest has a trap, that if you touch twice will kill everyone in your party!
16. Click on the EYE, then the LOCK, use Nandori she's the best with traps. You get a red jewel (give it to My-fetu and her spells will be twice as strong)! Now, get out and do the same with the wall on the other side of the room facing north (this part is optional and it's not necessary) there's another big room. Push the wall to any place you believe it's best, and you'll see a button on the wall. Pushing that button is asking for trouble honestly (nothing worth it). But let's go! :D --(if you want to skip this jump to paragraph 17).
Be absolutely careful (save your game), as you can see there's a huge spider web there. Where there is a spider-web, there sure is a spider around! Kill it as soon as you can. There's a trapped chest in that room. Make Nandori try to disarm the trap if you want, the chest is empty anyway.
17. I don't know about you but I'm fresh out of keys! So let's go back. You do not need to get to the other two rooms, one is empty, and the other one is the room where we were (where you saw Hanby). You can come back to them later when you get lockpicks (see section 30). Let's retrace our steps and try to head back to the LIBRARY then the LARGE ROOM WITH PILLARS. Now would be a good time to head to the GARDEN. Charge your firestick if you need to (see 11 and 13) at the SKULL there, or you can go to the VESTIBULE CORRIDOR's SKULL at the beginning of the game.
GARDEN[]
18. In the LARGE ROOM WITH PILLARS you want to go west-most. If you're coming from the LIBRARY it is all the way to the left (turn left then go forward). If you're coming from the entrance of the LARGE ROOM WITH PILLARS you want to turn right and walk forward until you can't any more. You'll be facing West. Between two torches there should be an up-stairs. Go up, and go exploring, or if you prefer directions: go forward (1), side-step right (2), forward (5), side-step left (2), forward (2), side-step left (2). Wow a statue! You're facing west, if you turn around you will see that East has an entrance. The statue at the west looks promising, but there's nothing there. Look around, nothing much. So when you're tired of wandering, go to the East entrance. Go right, go left (you have no other options at this point) keep going forward. A dark monk is coming at you, so make sure your firestick is at hand. He'll drop a mace, grab it, it's doesn't do as much damage as the dagger but it will help a bit. Now you should be getting an upgrade!!! Yeah!!!
19. I upgraded my characters the best I could, raised -Earth- spells on My-fetu. She can now cast Hold, Ice Storm and Thunder Bolt. The Hold spell will help in fleeing a monster. You do as you wish though, look at the spells section on the read me file (scroll all the way down, I have included it here at the end of this guide). Now you have probably noticed the entrance to your right (set of stairs to the South) and that's how you get to the GARDEN, but please don't go there yet, as there is a couple of keys you NEED to retrieve!
Keep walking and there's an entrance to the right past the stairs. If you look at your map, you will be able to see that there's a hidden wall there. Right click on it and keep braking all the walls, then you'll reach a chest with 2 (yes two) KEYS! You probably saw that the hallway doesn't end there, you can explore that section if you want. It leads to the gate you saw at the back of the LIBRARY, you CAN NOT enter the LIBRARY from there.
20. Now head back to the stairs to the south you saw before to direct yourself to the GARDEN. Save your game and follow these directions hopefully the RAT wont catch you unaware.
SIMPLE SIDE STEP DIRECTIONS: Forward (2), side-step right (3), forward (2), side-step right (2), forward (1), side-step right (2), back (1), side-step right (2), forward (1), side-step right (2), back (1), side-step right (2), Turn around-face west, forward (3), side-step right (2), forward (1), DO NOT REACH WEST WALL, side-step right (2), back (2), side-step right (2), forward (3), side-step right (2), Turn around-face east.
21. There's a scroll, but it's quite useless. Work your way out and look out for the RAT, these things will kill you, as they withdraw valor points like crazy. If your valor points are low, you can't attack it. Try your best to kill it with spells, but if nothing works, a HOLD spell is a must to get away from this creature fast.
Once you've faced the West wall, what you want to do is turn left then run South, ignore the passages that are useless right now. Ignore rose bushes they're pretty to look at, but that's about it. Keep going South and you will go through a gate, then turn left (East) then left (North), then right (East) look around you should find a stain-glass window. In that clearing, there are two entrances to the North (the up-most one is a dead-end) in the other you should be able to see a thin passage through bushes going North, go as far as you can then go East. That's where we should be heading, the MIRROR in the garden is nearby so keep going. There will be a passage to your left going North, which is long, it has no exits, at the end there's a door that has a combination lock. Ignore it for now, if you don't, you will most likely JAM it (you will be able to open that door in a few minutes).
22. So keep going East and you will find another passage going South, it should reveal a door that needs a key! Bingo! There's a spider waiting for you there. Kill the spider with everything you've got. You will see an outdoor ALTAR TO B'NAH. There's a wall with a button nearby, push that button and the combination door to the North passage will open.
MIRROR CIRCLE[]
23. Make your way to the long path where the combination door is (North). That's the MIRROR that will cure EVERYTHING and even revive your characters (right-click to activate). I believe this MIRROR can only be used ONCE. That part of the garden where the mirror is, will be referred to a MIRROR CIRCLE, there are many exits and a door with combination. I don't know about you but I don't feel like messing with it. Besides there are two exits, who needs the door with combination! :D
Now it is IMPORTANT that you stay oriented. You came into the MIRROR CIRCLE, facing North, BUT to leave the MIRROR CIRCLE back to the dungeon, you need to go through the SOUTH exit. Remember that.
24. To the North there's an exit, there's a place with nicely aligned rose bushes, a blocked gate, and there's another blocked passage with a spider behind it. You can open it now if you want, with the aquamarine Wither Potion you have. You'll need to kill the spider (I will include that in the GARDEN: 2ND VISIT a few paragraphs down) there's a button behind the spider too. But, right now we are mostly interested in the exit to the West of the MIRROR CIRCLE. You wont go too far when an old lady without name (warning: spoiler alert #2) will complain about not having any help. She will tell you to go back to the dungeon to retrieve a Wither Potion, and she'll give you a FREE token! Now you probably remember that back in the LIBRARY there's a couple of doors that needs a token.
So, let's go back to the LIBRARY! (You do not have enough Wither Potions to face all the weeds).
THE LIBRARY: 2ND VISIT[]
25. Make your way to the LIBRARY, and find the back stairs leading down. Go to the door and open it with the token. If you DO NOT remember how to get here, make sure to consult the 1st visit to the LIBRARY, it will give you detailed instructions on how to get there through the LARGE ROOM WITH PILLARS.
To your right there's the token door we saw, now you should be facing North. There's a dark monk inside and you shouldn't move too much ahead, give yourself room to run if you need to. Kill it and turn right (east) there's a chest there with quite a few aquamarine Wither Potions. There are lots of barrels, completely empty; but you want to find an additional Wither Potion on the floor (must face south wall). Also in that room, there's a gray button on the North wall, almost straight forward from where we killed the dark monk. If you push it you'll open a way to another token door at the hallway outside. There's NO NEED to open that token door, because that's the room with the pillars you saw before, where the second KNOWLEDGE CIRCLE is (see section paragraph 13). -Later, you will find another token in the garden (section 27). So if you want to verify what I'm saying be my guest, however you'd be glad to know that if you USE the token on this door here, you WONT be able to pass the game at all. (Refer to paragraph section 29 so you can see where to use that token).
GARDEN: 2ND VISIT[]
26. Go back to the garden all the way to the MIRROR CIRCLE. The North exit is the place with the spider. If you didn't get it before, you can clear the weeds and kill the spider quickly. There's a button right on that wall, turning to the right reveals a dead-end. Now, that button you just pressed opened up the East exit in the MIRROR CIRCLE... Remember, the door with combination lock we saw before? Let's make our way back to the MIRROR CIRCLE. I will cover the West exit where the old lady gave you the token, first.
Once you enter, there's a passage to your left (facing South) blocked by weeds. Clearing it reveals several push-walls. You should be facing south, push the wall. Now face west (to your right), when you push the wall there's a rat, try your best not to have it stun your characters. Nothing here, lets get out. When you push the wall to the left (facing east), you will open a passage to a gate blocked by weeds, open it and go forward.
HAMAS TOMB[]
27. This is the garden around Hamas tomb. There's a push wall, but nothing there. There's an empty chest, if you keep looking around you'll find a ladder going down. Be careful because there's an ogre that will attack you once you go into the tomb, now you WANT to kill this ogre because he's holding a Justice Sword, it's basically a super cool fire-blade! Find a chest there and you'll get -another token-! Nothing else to do here, climb back up.
Back to the MIRROR CIRCLE.
MIRROR CIRCLE: EAST[]
28. Enter the side to the east of the MIRROR CIRCLE. If you go as far as you can go, ignoring push walls, there's a spider. You should get it out of the way, as there are lots of monsters to fight behind the push walls. Now if you go all the way back, you will find a push-wall, sadly there's nothing there (what a rip-off)!
Near the place where you killed the spider, there's another push-wall, push it and push the next one. There's a scroll and perhaps My-fetu is the most qualified to read it. It says that Lord Tenis changed it's name to "King Of Shadows" I am not sure what that means but let's keep going.
There is a push wall to the end of the passage, there's also a combination door nearby. If you push the walls, you don't need to open this door. Now explore through the garden maze, there are 3 rats! You must kill them. Keep looking around and exploring. Eventually you will find a ladder going down, and you'll find yourself inside a den, of ogres and the Keeper.
SANCTUM OF THE KEEP[]
29. Before I begin, this place is full of traps, so beware. Get the push-walls, however the chest is trapped and I think it is also empty. Keep walking East and there's a door to your right (going south); it's a lever door so no need for keys. An ogre is coming toward you, kill it to get a red jewel. Unfortunately, the gates you see in each side can't be opened, there are only benches behind them. A Knock-Knock spell wouldn't be able to open them either, so they're there for looks.
This underground place is extremely big -but I can assure you- It's not hard to find your way, because there's a lot of room. Check everything! To the west there's a big section with many rotten spears on the walls. You can't take them but remember this room to keep oriented. Go to the West wall on that room then go South, you will finally find FOOD! There are 4 packets of rations.
If your characters are not too hungry, you can save those for later (lol no I'm not joking). -By now you probably found that the more you move, and the less you rest; the less hungry your characters will be. It takes practice, but by the third time I played this chapter I had managed to reach the MIRROR and my characters were just barely getting hungry.
30. Keep killing ogres there are at least 6, the valor points you get is priceless and one of the ogres will drop LOCKPICKS! Remember all the doors in the chapter you weren't able to open? Well now you can. You CAN NOT open token doors or combination doors with lockpicks though. Only doors that require a common key, and doors that require buttons pushed nearby.
If you keep going towards the East where you found the food, you will eventually reach a token door. Remember the TOKEN we spoke so much about? Well this is the room with the passage to where the Keeper is. There's a creepy looking picture of a woman, you want to turn left from there. Now the entrance is blocked by a gate, unless you get out of the room and go to the East, there's a push-wall and a button behind it that will reveal another button (this one is trapped). The Keeper is NOT happy you came to invade his privacy, but he's not as strong as you think. You need to press a couple of more trapped buttons to be able to fight him. Just make sure to hit him with lots of Fireballs, Ice Storms and Thunderbolts.
Once you kill the Keeper you will be able to walk to a room with what seems to be a green glow circle (that's the EYE Hanby was talking about), then you will be congratulated for you have completed Chapter #1: Prelude To Glory! Congratulations!
ATTENTION: FROM THIS POINT ON, I DO NOT TAKE CREDIT FOR THE INFORMATION AS THIS IS THE HELP FILE THAT IS PROVIDED FOR YOU WITH THE GAME. LOTS OF QUESTIONS YOU MAY HAVE ARE CONTAINED THEREIN.
TEXT IN FILE: TOME.DOC[]
The Infernal Tome
Episode 1: Shardmoure Keep
Shareware Evaluation Version
Copyright 1996 Don Lemons
An MVP Software Production
Welcome to The Infernal Tome, a fantasy/role-playing adventure game.
In Tome you will encounter strange creatures and bizarre situations,
as you explore Shardmoure Keep below the world of Garon. You will
be called upon to solve puzzles, defeat enemies, all the while
keeping your party of four alive and healthy.
If you've never played a role-playing game before, here are a few general hints. First, pick up everthing you can find. When you encounter a new area, search it thoroughly. Second, save your game often. In Tome you will meet up with some fearsome monsters. While there are ways your party can recover even from the fiercest attack, you may want to go back to a saved game sometimes. Tome lets you save many games at different stages. Third, look carefully at messages you are given. Often they are clues that are necessary to solve the game's puzzles.
In Tome you will lead a party of four characters. While you can choose your characters and give them characteristics and abilities of your choosing, it is best to play the game for a while first with the default characters to get a feel for what is needed. Tome allows you to jump right in and start playing, but it also gives veteran RPG players the flexibility to choose almost everything about their party.
Finally, read this entire manual. In fact, print it out and keep it handy while you are playing the game. It contains a lot of valuable information.
This game is shareware. You may freely try it. If you like it or find it useful, then you must register with MVP Software. To "register" a shareware game means to purchase it directly from the developer. (Shareware games are evaluation versions only, which means you have the right to try them, but after trying them you must either register them with the author or delete them from your system. It is unlikely that anyone will check up on you, so shareware works because of the honesty of users.) When you register you will receive The Infernal Tome trilogy CD, which includes all of the following additional features:
- All three spine-tingling episodes -- 20 megs in all.
- Lots more monsters, graphics, music, sound and animations.
- Incredible digitized speech throughout the game.
- A CD of suspense and intrigue (not available on diskette).
- A hint book and manual written by the author that will help get you through those tough spots.
- Cheat codes for party power-ups, healing and kill monsters.
- An auto-map so you can tell where you've been in the Keep and what territory remains to be explored.
The Infernal Tome trilogy CD has a suggested retail price of $39.95. However, MVP customers may purchase it directly from MVP for just $29.95 plus shipping, a savings of $10. So order today!
To order, call 800-968-9684 toll-free 24 hours a day. Please have your Master Card or Visa ready when you call. Or fill out the order form in this manual and fax it to: 616-245-3204. Make sure your credit card number and expiration date are legible. Or if you prefer mail the order form and your check to: MVP Software, 1035 Dallas SE, Grand Rapids, MI 49507-1407.
For overseas orders or technical support call 616-245-8376.
Download All the Latest MVP Shareware Games FREE
If your favorite BBS doesn't have an MVP file section, then you may be missing some great shareware. To get all the latest and greatest MVP shareware releases, call one of the leading boards listed below, and check out the FREE MVP file area.
In Grand Rapids, Michigan -- Ryan's Bar (616) 456-1845
In Milwaukee, Wisconsin -- Exec-PC (414) 789-4360
In New York, New York -- The Invention Factory (212) 274-8110
In Boston, Massachusetts -- Channel 1 (617) 354-3230
In Kansas City, Missouri -- Sound Advice (816) 436-8029
In Palo Alto, California -- Space BBS (415) 323-4193
In Reston, Virginia -- World Data Network (703) 620-8900
Or call Intercomm Online at (310) 858-6200, the new source for
all of MVP's shareware and registered software.
Even better, tell your favorite sysop about the MVP Distribution Network and how he can be assured of getting all of the latest MVP shareware hits as soon as they are released. See the SYSOP.DOC file for details.
MVP is Now on CompuServe!
You can get all of the latest MVP shareware releases, and discuss MVP titles directly with the authors on MVP's new section on the world's largest online information network, CompuServe. Just type GO MVPSOFT to get to our section! If you are not a CompuServe member you are eligible to receive a FREE trial membership, including software and online time worth almost $55! That's right, you get the CompuServe Information Manager software for DOS or Windows, which normally costs $29.95. Plus you get a free first month of online access, worth $9.95. And to top it off, you get a usage credit of $15 of additional online time.
To take advantage of this free trial membership to the largest online service in the world, call 800-848-8199. Ask for rep 671. And then GO MVPSOFT and talk to the MVP team on CompuServe.
MVP is Now on the Internet and the World Wide Web!
You can get all of the latest MVP shareware releases, find out news of future activities, and give feedback to MVP on the Internet. To visit our new home page, just set your WWW browser to this URL:
While there, you can see descriptions of all our releases, download the shareware versions with a click of your mouse button, and check out full color screen shots for all of our games. Be sure to leave feedback telling us how you like our page!
If you prefer using direct ftp to get our files, you can find them at the following sites:
ftp.mvpsoft.com/pub/mvpsoft
ftp.he.net/pub/mvpsoft
ftp.uwp.edu/pub/msdos/games/mvp
archive.uwp.edu/pub/msdos/games/mvp
Users accessing either of the last two sites on this list must
include a dash in front of their email addresses for the password.
Without that dash the software won't give you access.
These sites also have many mirrors, so just look for a game site with an MVP directory, and you'll be assured of getting the best games around!
The Story So Far . . .
In a future time, science has become as magic. In this time two scientists, Peter and Bartholomew, created the ultimate spell that could stop time itself. To protect their work, they recorded it in a mysterious book they named the Infernal Tome, and they created a world, named Garon, and stored the Tome in its fiery depths. They populated Garon with a race of beings called the Draden.
But sadly, these two scientists argued. Their disagreement resulted in a cataclysmic battle, ending with Peter banishing Bartholomew into the depths of Garon.
Eventually the Draden evolved into 4 races -- Dryadens, Grimhadens, Humans, and Halflings. These races only faintly remembered their creators, now named P'Tah and B'Nah.
As the years passed the races formed the High Council. The first Lord of the High Council, Lord Tenis, governed the races with an iron hand. In his half-awakened state B'Nah offered Tenis the gift of ultimate power, if he would but submit his will. Tenis succumbed to this temptation, but in the madness of the power, he killed his consort, the Lady Ganryn.
In his anger, Tenis took upon himself the name of the King of Shadows. To honor his vow to B'Nah, he built Shardmoure Keep to protect the entrance to B'Nah's resting place, but in vengeance he allowed no one access to B'Nah's crypt.
The ShadowKing has discovered and started to unravel the secrets of the Infernal Tome. The priests of P'Tah have commanded you and your party to venture forth into Shardmoure and wrest the Tome from his grasp. And thus it begins...
My-Fetu's Diary
---------------
I am My-Fetu born sired of Calatus, of the clan of the ShadowWeaven, of the race of Halfling, of the people named Voranu. These are the chronicles of my participation in the quest to free the Tome from the clutches of the Dead Lord.
Day 1
---------------
I was summoned by messenger to report to the priests of temple P'Tah in my home haven of Enu. An acolyte loomed before me at the vestibule and issued me to the chamber of the high priest S'Tak and bid me sit.
As my eyes became accustomed to the gloom I made out the shadowy figure of S'Tak, his snowy white beard glowing faintly. I advanced towards him but drew up short as he held up a single gnarled finger. I was frozen, my breath caught in my throat.
He finished his ruminations and raised a wizened face towards me. A single brow shot up. "So this is what the race of Halfling has to offer," he said. "Ah well, the foundation of a building cannot be judged from it's entrance." He lowered his finger and I was released.
"The future of the Voranu rests upon the shoulders of you and your party," he said. "The danger is grave. You must proceed to Shardmoure Keep, on the northern reaches of the Bright Lands. Waiting there will be the Dead Lord with his minion, the King of Shadows."
I protested. "The Dead Lord is but a myth used to frighten the young," I said. "Tell me not of fantasies."
"QUIET!" roared the druid master. "Forsooth, I tell you now in truth. This generation has much to learn of the Time of Legends. The age of childhood is passed."
I protested more, but to little avail. Now I and my three companions find ourselves journeying to the northern reaches, our wallets containing letters of writ drawing upon the coffers of the order of P'Tah.
Day 12
---------------
This day we have reached the Dragonspine, the home of the Grimhaden, the squat softspoken masters of the stone. The race of the Grimhaden are taciturn, tending to themselves, their attitudes doubtless brought on by the cold starkness of their mountain retreats. This was a time to rest our weary bodies and replenish our stores. P'Tor, the blunt warrior of our traveling party, seemed at peace among the lands of his people. We presented our letters of writ with little use. The Grimhaden pay scant attention to those they deem lesser among Voranu. Only the agreements of the Accord Codex ensure that they abide by the rule of the High Council. If not for P'Tor drawing upon the favors of his extended family we would have gone hungry.
Day 15
---------------
We crossed into the forests of Dryaden. The Dryaden are a quiet race, looking down imperiously on those not of their kind. From my time with Nandori however, I know that they have a humorous streak, which they strive to keep hidden from the others of the Voranu.
As we crossed the Solemn river, we surprised a Dark Monk. The follower of darkness glared and cast a single firebolt that singed my tunic. Another flash paralyzed P'Tor, placing him under a Hold Spell. I muttered a quick release spell, freeing him to wreak havoc with his short sword. We made short work of the monk after that, suffering only minor wounds.
Day 19
---------------
We have finished our northern trek to the gates of ShardMoure Keep. After dealing with the Ogre guard positioned at the entrance, we have made our way inside. The entrance has closed behind us. We have but one way in which we can travel, forward into the gloom....
Thus far the reading of the diary of My-Fetu.
Installation of The Infernal Tome
If you downloaded this file from a BBS or online service,
installation is simple. First, make sure you are out of Windows
completely. Next, unarchive the files into a directory on your hard
drive. Then type TOME and press ENTER. That's all there is to it!
If the game doesn't load, read the next section.
Once Tome is loaded, the first thing you will see is a configuration screen for customizing the sound and music on your system. Move the slide bars on this screen to change the volume levels of the sound and music to your taste.
System Requirements and Troubleshooting
---------------
The Infernal Tome requires a 386 or higher processor, at least 4 meg RAM, 550 free conventional RAM, and a VGA graphics card and monitor. A mouse and sound card are recommended. If Tome doesn't load when you try to play the game, it will probably give you an error message indicating that your system doesn't have enough available memory for the program to run.
To solve this problem, first go back to the DOS prompt. Then type MEMMAKER and press ENTER. Memmaker is a DOS utility that will organize your computer's memory more efficiently. Accept the default settings in Memmaker, running it in "Express Setup," and telling it that you need "No EMS", or expanded memory. Expanded memory is an old an inefficient way of organizing memory in excess of 1 meg.
Memmaker will reboot your computer a few times. When it is finished, it will give you a report on the additional memory it has freed up. It should say that your system has at least 550k free conventional RAM and 2 meg XMS (extended memory).
If you have run Memmaker and you still get the insufficient memory message when you try to run Tome, load your CONFIG.SYS file into a text editor and put the word "rem" in front of the line in which you see "EMM386", and reboot your computer. (If you don't know how to do this you shouldn't be messing with this setting on your computer anyway, so I would rather not say much more about this.) Another option is to purchase QEMM 8, a third-party memory manager that is far superior to EMM386, which comes with DOS.
Here are some other command-line settings you can use to load Tome if you experience other difficulties. To invoke any of these, load the game by typing TOME /<option>, where <option> refers to any of the three following choices. (Don't type the brackets when you use any of these.)
/CFG - Normally, TOME does not ask your system configuration at the outset after the first time you play it. To force TOME to present the configuration menu, use this option.
/LOW - For computers with slower VGA boards or CPUs, the /LOW switch will turn off some of the game display detail. This will not impact the game's playability, just some of the finer graphic details.
/NOSB - In certain instances, TOME may mistakenly detect a Sound Blaster board. This can cause the game to crash. Using this option will force TOME to configure itself for the PC speaker.
At any time during the game, you may press the ? key to bring up
either a help file or My-Fetu's diary.
Another common problem with DOS games is that the mouse driver may
not be loaded. If your mouse doesn't work with the game, this is
why. A mouse driver is a piece of software that allows DOS programs
to communicate with the hardware. It is normally called MOUSE.EXE
or MOUSE.COM. For your mouse to work with Tome you must find and
run this program first. If you don't know where it is, contact the
company from whom you purchased your computer. A properly setup
system will load the mouse driver automatically upon bootup.
The People of Garon
Welcome to TOME, a multi-character fantasy role-playing trilogy.
Within TOME, you will take your party of characters into the depths
of Shardmoure Keep, home of the ShadowKing. To successfully win the
game, you will have to solve puzzles, find important items, learn
the art of combat, and deal with villains such as the Keeper, the
dead lord B'Nah, and the ShadowKing himself.
Quick Start
---------------
TOME comes preloaded with four characters who have a healthy spread of abilities. If you would like to play the game using these four characters, select New Game from the Main Menu, and then Select START. For those who like to create their own characters, read on.
Character Creation
---------------
You can create new characters every time you select NEW GAME from the Main Menu. From the NEW GAME you may select START a new game, LOAD characters from a previous game, edit a character, or EXIT back to the Main menu.
A character's traits are divided into two categories: ATTRIBUTES and
TRAINING.
ATTRIBUTES are those abilities that are dictated by a character's
race. They are inborn and cannot change. Attributes range from 0
(none at all) to 20 (superhuman). Depending on the attributes'
values possessed by a character, that character can enter certain
professions. These attributes include:
Intelligence - Self explanatory. The intelligence of a character is a primary trait for wizards.
Strength - Strong characters can hit harder and carry more weight. Strength is primary for barbarians, and secondary for paladins.
Piety - How devout is the character? Piety is an essential trait for a cleric, and to a lesser extent for paladins.
Coordination - The eye-hand coordination of the character, fundamental for a thief.
In addition to the these four primary traits, there are two other
traits that are just as important, governing how your character
reacts.
Speed - How quickly a character regains the use of his hands once he strikes in battle.
Hit Points - The amount of damage a character can take before s/he dies.
When you create your character, you are allowed a certain number of
attribute "BONUS POINTS." These range from 0-2 and may be
distributed across the character's abilities to customize the
character as you wish. You are only awarded attribute points during
character creation.
TRAINING reflects the areas in which a character has been trained. Although partially influenced by ATTRIBUTES (i.e., a character cannot possess more skill than he has the innate ability for), these skills can grow as the character moves through the game.
Trained skills include:
Locks/Traps - Skill in picking locks and disarming traps. Should be at least a 6.
Scribing - The ability to recognize artifacts. Without this ability, a character may unintentionally injure himself or others through the incorrect use of an object. A '6' in this category gives the party the ability to read all languages, including Grimhaden, Dryaden, High Voranu, and Shadowen.
Weapons - How your character handles contact and range weapons and shields.
Water - Training in water magic.
Earth - Training in earth magic.
Air - Training in magic of the air.
Fire - Training in fire magic.
As with ATTRIBUTES, you have from 0-2 Bonus points to customize the
character. Unlike ATTRIBUTES, you get additional training points
for every 100, 150, or 200 valor points (depending upon the play
level you select) until your character becomes a 10th level
character. Not all characters need to be proficient in all areas,
of course, but your party should have a wide range of attributes and
training.
Character Condition
---------------
During the game your characters will encounter traps and different monsters. During these encounters your character will sometimes become hampered. The characters' current conditions are represented by small icons on the game play screen next to the their faces.
These icons include: a skull for death, a green face for poisoned, a ZZZZ symbol to indicate a stun or paralysis, and a ??? symbol to indicate a confused character.
A stunned or paralyzed character will awaken after a day's rest. During that day, he can perform no action. The condition can be lifted with an Awaken spell.
A confused character will only perform the action asked of him approximately 50% of the time. A day's rest will cure confusion.
A poisoned character will remain poisoned until either a cure poison spell is cast, or a cure poison potion is found (or made) and administered. Poisoned characters wil tire more easily and will be damaged more severely during combat.
A dead character may be revived through a Raise The Dead spell, or by the administering of a Raise The Dead potion. The magic mirror in the garden in episode one can also raise a dead character to life again.
The Professions
---------------
There are six professions. There are certain minimum attribute points required to enter each profession. Each profession provides training in certain areas. The professions are:
Barbarian - Extremely capable with weapons, but lacking any ability at all with magic, barbarians are the perfect fighting machine. To enter the barbarian profession a character must have a strength of at least 13. Barbarians are highly trained in the use of weapons and have a little skill in the use of lock picks and traps.
Paladin - Paladins are holy knights, trained in the use of the healing arts as well as the use of weapons. To enter the paladin profession, a character must have at least a 10 in both piety and strength.
Wizards - Wizards are highly intelligent and extremely well trained in all forms of magic (but hold some disregard for the healing magic of water). The primary trait for wizards is intelligence. A character must have at least an intelligence level of 13 to be a Wizard.
Rogue - Rogues are jacks of all trades, and masters of none. Unlike the skilled professions, Rogues have picked up their training on the street, learning a little of every skill. A Rogue is a valuable addition to any party lacking in several skills.
Clerics - Clerics are highly trained in the art of healing. A cleric's primary ability is his skill in water magic. A character must have at least an 11 in piety to enter the cleric profession.
Thief - Thieves are highly trained in the art of manipulating locks and traps. Without a thief your characters are likely to jam most locks and set off most traps. A character needs a minimum of 12 in coordination to become a thief.
Gender
---------------
In addition to attributes and training, two other factors are important. These are gender and race. A male character has an additional rating point for strength, while a female character has an additional rating point for coordination. Males lose a rating point for coordination; females lose a point for strength.
The Races
---------------
There are four races among the Voranu (the people of Garon). These races include:
Human - Good at most everything, exceptional at nothing. Little resistance to magic.
Intelligence 7-14
Strength 9-15
Piety 10-14
Coordination 7-11
Hit Points 70-90
Speed 3-6
Grimhaden - Poor at magic, excellent strength and stamina. Good resistance to magic.
Intelligence 6-12
Strength 12-18
Piety 2-6
Coordination 9-13
Hit Points 80-120
Speed 1-4
Dryads - Somewhat weaker than humans, good in in intelligence, coordination, and hand speed. Some resistance to magic.
Intelligence 8-15
Strength 8-13
Piety 8-10
Coordination 10-15
Hit Points 50-70
Speed 5-8
Halflings - The weakest sorts physically, but the most skilled at all types of magic. Excellent resistance to magic. The most coordinated of the four races of the Voranu.
Intelligence 9-18
Strength 7-12
Piety 10-16
Coordination 9-17
Hit Points 40-60
Speed 7-10
Magic Within Tome
---------------
Magic is very important within the world of TOME. Without characters skilled in the use of magic, your efforts will be doomed to failure, therefore a short discussion in magic is in order.
There are 4 kinds of magic.
Air spells are spells that manipulate the environment, such as
'Knock Knock' (opens locked doors) and Eagle Eye (Views a larger
area of the map).
Earth spells are those of the physical realm, such as Ice Storm,
and HOLD.
Water spells are healing spells, such as 'Balm of P'Tah'.
Fire spells are attack spells, such as Fireball, and Inferno's Blast.
Spells can be learned in 3 different ways. When you create a
character, you will be prompted to select a spell for which the
character has magic in each category.
Likewise when the character gains a level (every 150, 250, or 400
valor points) you will again be asked. Current valor points, and
the points required to go to the next level can be viewed on the
character's profile, brought up by hitting F1-F4, or clicking with
the left mouse key on the character's face.
Finally, in the maze are magic scrolls that will impart one spell of
a certain magic type.
Play level
---------------
When you first start TOME, the game will ask you for the play level. On the harder levels, monsters will be more difficult to kill and will be more prone to invoke special attacks. It will also be harder to advance your characters as you select harder levels.
Playing The Infernal Tome
Manipulating Characters
---------------
Along the edges of the play field are the characters' faces. Below each face is shown what they are carrying in each hand. Next to the characters' face are three bar graphs showing their vitality, stamina, and magic strength. Each graph ranges from 0-100%.
Vitality represents the character's life energy. When a character's
vitality is less than 5, he falls asleep. When a character's
vitality is 0, he is dead.
Stamina represents the character's constitution (how quickly he will
recover). If a character's stamina is less than 50%, he will not
strike as hard nor recover as quickly.
Magic represents the character's magic strength. As a character's
magic strength falls, he is capable of casting fewer kinds of
spells.
Spellcasting Shortcut
---------------
There is a shortcut to spell casting. Select the character with the 'right' mouse button will go straight to the spell book, pre-selected to the last page that the character used.
To select a character, to view his vital signs or see what's in his inventory, click the mouse on the character's face, or hit F1-F4.
To use an item in a character's hand, select the hand with the left mouse, or click 1/2 for left/right character 1, 3/4 for left/right character 2, etc. Click with the right mouse key to take an object out of a character's hand, or to exchange the mouse object with the object in the character's hand.
The Skull
---------------
Above the viewing area is a skull. The skull's eyes will glow when you encounter a trap you have already identified. Clicking the left mouse on the skull's head (or hit the Q key) and the skull will allow you to ask a question about the world of Garon. Try asking the skull about Tenis.
Firesticks
---------------
Throughout the maze are powerful weapons called firesticks. These invoke up to 100 points of damage upon a monster. These can be recharged by the spinning skulls. Hold the firestick up against a spinning skull and click the right mouse button to recharge the weapon.
Movement
---------------
Movement is accomplished by clicking on the arrows below the 3D viewing area with the mouse, or using the numeric keypad.
Radar View
---------------
In the left lower corner of the screen is a radar view showing the area immediately around you. This view is especially helpful, since it shows the current state of all doors, levers, etc.
Manipulating Objects
---------------
There are several ways to manipulate objects within TOME. Using the right mouse button, or the 'W' key, will 'work' objects such as locks, levers, and buttons. Clicking the left mouse key, or hitting 'G/D' will pick up and drop objects. If you have picked up an object, hitting the 'P' key will pitch (throw) it.
If you are on a character's inventory screen, you may still Get and Drop objects. Use the right mouse button to 'use' an object. Use the left mouse button to exchange an object in the inventory bag for what's being carried by the mouse.
Icon Menu
---------------
The Icon menu is located in the lower right-hand corner of the screen. There are 7 icons.
Pressing the ? brings up the help text.
Selecting the wizard, or hitting 'S' will allow you to cast a spell in one of the four categories -- Water, Earth, Air, or Fire.
Spell Casting
---------------
Hit S or select wizard on the icon menu. Select spellcaster. Move through the spells in the spellbook by clicking the mouse on the left/right hand edged of the book, or hit W, A, F, or E (for Water/Air/Fire/Earth). Spells that the magician knows and for which he has the strength are presented. Use the up down arrows to select or click on the spell with the mouse. The spell will be cast. In the Keep are special gems called T'Ganths. T'Ganths act as focusing gems that will boost the power of a magic user if held while casting. Locating these will make your magicians much more lethal.
Checking Time of Day
---------------
Selecting the Timer, or hitting 'T' will display the time of day.
Examining Items
---------------
Selecting the Eyeball , or hitting 'X' will cause your characters to examine the space in front of them. Many objects throughout TOME are trapped. Before a trap can be disarmed, you must examine the object to find the trap. (Another way to find the trap is to use the object and have the trap explode in your face).
Options
---------------
Selecting the Diskette, or hitting ESC will bring up the options menu. This menu allows saving/loading/exiting, swapping character positions, and re-configuring your sound options.
Resting
---------------
Selecting the camp fire will rest your characters. During rest, stunned characters will awaken, and tired ones will re-gain stamina, vitality, and magic strength.
Disarming Traps
---------------
Selecting the safe icon, or hitting 'D' will give opportunity to disarm a trap that has been found by stumbling into it, or through examination.
Doors
---------------
Doors are opened with levers, with buttons, with a key, with a token and by working combination locks. When opening a combination lock, it is easy to jam it. Using characters skilled at picking locks will help. Once a door is jammed, you must either use a 'Knock-Knock' spell, or find a way around the door. (There is at least one way around all locked doors in the game.)
Buttons and Levers
---------------
Throughout the game there are many buttons and levers. These items might affect something anywhere else in the maze.
Battling Monsters
---------------
Keep your front characters armed and strong. If they are weakening, don't hesitate to use a 'Balm of P'Tah', or even switch their position with another character. Use attack spells often. If necessary, try backing up right after you have struck (this will give your characters a chance to recover their hands). Remember that certain monsters are immune to certain types of magic.
You have some control over how your characters react in battle. The character profile has two entries, Thrust/Swing and Dodge/Guard. Use the A/D keys or click on them with the mouse. Thrust means a quick forward thrust with the weapon. This results in only a 60% chance of hitting, but does double damage. Swing means swinging the weapon in a broad arc. This results in a 90% chance of hitting the enemy and does normal damage. Dodge means the character ducks. Guard means the character stands his ground, and tries to hit back.
Monsters
---------------
Following is a brief list of some of the creatures of TOME. Armor class represents the chance the monster will absorb your blow. Hit points represents the amount of vitality of that monster. Watch out for monsters with special attacks! Some monsters will drop items when they are destroyed.
  Giant spider   AC:4  HP:165-400  Magic Immunity: None
                 Special Attack:Poison
  Dark Monk      AC:7  HP:100-300  Magic Immunity:Earth
                 Special Attack:Paralysis  Magic:Yes
  Ogre guard     AC:5  HP:225-500  Magic Immunity: Earth
                 Special Attack:None
  Giant Rat      AC:6  HP:200-500  Magic Immunity: None
                 Special Attack:Fear (steals valor points)
  The Keeper     AC:8  HP:700-900  Magic Immunity: Fire
                 Special Attack:Stun and Paralysis  Magic:Yes
Additional Character Information
---------------
A character also has a food characteristic. If a character is starving, his vitality will go down quickly.
The character's current inventory is represented on page two of the character's attributes. To select an object, click on it, or move the selection box and hit Enter (till the object is highlighted in red). Once the object is highlighted, you can move it, or, using the menu, Examine, or Use item.
Page two shows you the amount of weight being carried.
Spells
---------------
Name Energy Min. User Rnk Min. Magic Level
---------------
Water Spells
---------------
Awaken 40 2 6 -Awakens a party member who has been stunned.
Cure Poison 50 1 7 -Cures poison from a trap or a monster.
Bless 45 1 1 -Prevents extra damage to a character from a monster.
Armor 30 2 6 -Adds a point of armor protection to a character.
P'Tah's Balm 15 1 4 -Heals between 5 and 10 points of damage to a character.
Raise Dead 80 5 5 -Raises a party member from the dead.
Ice Storm 25 2 5 -Casts a freezing blast of cold at a monster.
Make Vitality 50 2 1 -Creates a healing potion (need an empty bottle).
Make Life 60 4 4 -Creates a death-curing potion (need an empty bottle).
Earth Spells
---------------
Knock Knock 25 3 5 -Opens a locked door.
Reveal Traps 25 1 3 -Shows whether or not an object contains a trap.
Dissolve Wall 25 2 5 -Dissolves Push walls.
Disarm Traps 30 3 5 -Disarms trapped objects.
Hold 50 1 1 -Freezes a monster in place.
Wind Spells
---------------
Eagle Eye 10 2 3 -Shows 5 surrounding map squares in all directions.
Thunderbolt 30 1 5 -Casts a roaring blast of sound at a monster.
Confusion 20 1 3 -Casts a web of confusion over a monster's senses.
Unparalyze 35 1 5 -Un paralyzes a paralyzed character.
Levitate 25 1 6 -Lifts and moves the party forward up to 3 spaces (use to get over pits, and floor clutter).
Lightning 30 2 5 -Casts a bolt of lightening against a monster.
Ward 90 1 1 -Places a spinning object barring a monster from advancing. If a monster is in the space then the ward will not form.
Fire Spells
---------------
Fire Ball 25 1 1 -Casts a bolt of fire at a monster.
Flame Strike 25 2 6 -Casts several small balls of fire at a monster.
Forge Metal 40 3 7 -Strengthens a weapon so that it can hit harder.
Inferno Blast 100 4 7 -Casts a bolt of energy capable of killing most monsters.
------------The Infernal Tome Trilogy Order Form------------
Name ______________________________________________________________
Address ___________________________________________________________
City _______________________________ State ______ ZIP _____________
Country (if outside USA) __________________________________________
Important: The Infernal Tome trilogy is available on CD only.
Price of The Infernal Tome Trilogy $29.95
Shipping and Handling (US) 4.00
Shipping and Handling (Canada) 5.00
Shipping and Handling (all other countries) 6.00
Michigan residents add sales tax 2.04
-- ---------------
Make check payable to "MVP Software" Total enclosed: $
Master Card/Visa information (credit card orders only)
Card number __________________________________________
Expiration date ______________________________________
-------------------------------------
VOLUNTARY QUESTIONS: Please help us determine what features you would like in future products.
Circle what type of equipment you have: 386 486SX 486DX Pentium
Circle the speed of your computer(Mhz): 25 33 40 50 66 90 ___
Circle any that apply: Joystick Mouse Modem_______ CD_______
-------------------------------------(speed) (speed)
Sound Capability: Adlib Sound Blaster SB Pro SB AWE32
PC speaker only Other ____________________________________
Where did you get The Infernal Tome shareware version?
Friend CompuServe AOL Prodigy Channel 1 Invention Factory
World Data Network Ryan's Bar Exec-PC Space BBS Sound Advice
Other BBS Shareware Distributor (name): __________________________
Other ______________________________________________________________
-------------------------------------
Send this order form and your check to:
MVP Software, 1035 Dallas S.E., Grand Rapids, MI 49507-1407
Checks must be in US funds and drawn on a US or Canadian bank.
US or Canada 24-hour order line: 800-968-9684. Fax: 616-245-3204.
Tech support, information, or overseas order line: 616-245-8376.
---------------Ordering Information---------------
The Infernal Tome Trilogy CD is available from the following authorized distributors:
In the United States:
---------------
MVP Software
1035 Dallas SE
Grand Rapids, MI 49507-1407
phone: 800-968-9684 24-hour order line only
(616) 245-8376 information, technical support, or orders.
fax: (616) 245-3204
order price: $29.95 plus $4.00 shipping in the US, $5.00 shipping to Canada, $6.00 shipping everywhere else. Michigan residents please add appropriate sales tax.
In Australia:
---------------
Budgetware
9 Albermarle St
Newtown NSW 2042
phone: (02) 519-4233 Fax: (02) 516-4236
order price: $A45.00 (includes shipping)
In the United Kingdom:
---------------
Atlantic Coast Plc.
Station Rd.
Colyton, Devon, EX13 6HA
phone: 1297 552222 Fax: 1297 553366
order price: L30 (includes shipping and taxes)
Dealers please enquire.
In Denmark and all of Scandanavia:
---------------
Pro-Soft
Benloese Skel 4 G
DK 4100 Ringsted
phone: 53 61 90 42 fax: 53 61 93 91
order price: 210,00 kr. + VAT 25% + s/h 25,00
In Japan:
---------------
P. & A. Company Ltd
302 Bellwins, 1367-23
Nakagami, Akishima, Tokyo 196
phone: 425-46-9141 fax: 425-46-9142
BBS: 425-46-9143
order price: 4500 yen includes shipping and taxes
Germany, Austria, and Switzerland
---------------
JDS -- Software Vertrieb
Jens Driese
Postfach 1269
D-26302
phone: 04451-85743 fax: 04451-860500
CIS: 100273,2252 BTX: DRIESE#
order price: 49 DM (includes taxes) plus 6 DM shipping
The Netherlands and Belgium
---------------
CSD -- Computer Solutions Dorth
Postbus 59
NL-7213 ZH Gorssel
THE NETHERLANDS
phone: (+31)0575.494.545 Fax: (+31)0575.491.222
order price: fl. 65,00 (includes VAT and shipping)
Italy
---------------
Systems Comunicazioni srl
via Olanda
6 - 20083 Gaggiano
phone: (02) 9084 1814 fax: (02) 9084 1682
BBS: (02) 9084 1811
order price: Lire 62.000 IVA inclusa
Spain
---------------
Friendware S.L.
Rafael Calvo, 40
28010 Madrid
phone: (91) 308 34 46 Fax: (91) 308 52 97
CIS: 100413,1667
order price: 4.000 Pts
Spoilers[]
1. The old wise monk named Hanby? - Who the heck is he anyway? I am sad to say that the warnings the game guide came with, saying to expect the unexpected were quite true. In reality Hanby is far from being on your side and far from being a wise monk. Hanby is actually B'Nah and turns to a horrific looking skeleton in Chapter 3 which you must defeat.
2. The old lady without a name? - Later on in Chapter#2 you will find she's the grandmother of Ramona. Ramona will betray you briefly in Chapter #2 before she finds the horrible mistake she made, and turns to help you. You MUST forgive her to be able to move on in the game!
External Links[]
- Dos Museum zip file download (Chapter#1), if that link doesn't work try this one